Search

顯示具有 wxWidgets 標籤的文章。 顯示所有文章

2019年11月25日 星期一

ESP32-CAM MJPEG Stream Decoder and Control Library


  半年前在做自己的Computer Vision Board採買材料時,無意間知道ESP32-CAM這東西,買來放一段時間後,上週末有空拿出來測試這東西挺讓我驚艷,相見恨晚,主要是150NTD的價格加上已經有現成的Arduino相容範例,直接搞定SCCB設定跟DCMI Data還有一個4M PSRAM作為Frame Buffer,收到的MJPEG Stream在 UXGA 1600x1200解析度可以約10FPS每個JPEG 100Kb左右。
  就整體來說這東西在Wi-Fi環境感覺上非常具有淺力,一些多Camera Computer Vision的應用可以配合Raspberry Pi運算,或者簡單的Robot需要Computer Vision然後輔以別的控制器以UART通訊控制(GPIO扣掉SCCB+DCMI和SDIO只剩UART...)都是不錯的選擇。
  我把wxRovio的軟體改一改後主要是抽出C/C++ MJPEG Stream decode,還有示範POST參數給ESP32-CAM修改解析度,基本上相依OpenCV和libcurl,在Github有用OpenCV GUI和wxWidgets GUI的範例,後者順便放YOLO V3和OpenPose的DNN應用,Library在MAC和Win10+VS2017編譯x64版本都可以通過。


2019年11月9日 星期六

Atrial Fibrillation Detection Blood Pressure Monitor Oscillometric Method


This project is electronic blood pressure monitor research platform with Oscillometric method, include SBP and DBP estimate algorithm, Atrial Fibrillation detection algorithm, calibration curve, GUI tool for fine-tune BP algorithm...etc, ofcourse, this is research use only.


2019年9月29日 星期日

wxECGAnalyzer - cross platform ECG signal process tool

Detection of abnormal rhythm morphologies is more difficult than normal beat, therefore, we need to collect abnormal rhythm signals in clinical practice  to improve the detection of QRS-complex.

This project is for Electrocardiogram(ECG) signal algorithms design and validation, include preprocessing, QRS-Complex detection, embedded system validation, ECG segmentation, label your machine learning dataset, and clinical trial...etc.

For algorithm performance, in ANSI/AAMI EC38,it is required that the detected QRS shall in the 150ms range of the signed point from annotation by human exper.

目前僅用MIT-BIH等標準心律不整資料庫或是生理訊號挑戰賽提供的標註資料,理論上很難得到超越其標注的學習模型,實務上還是需要配合其他臨床實驗搜集更多案例強化模型,下個To-Do會用標準資料庫訓練分類模型增加基本的自動化標註,目前僅針對臨床實時運行的特殊案例配合人工選擇QRS-Complex演算法自動切片。


2019年7月21日 星期日

Cross-Platform Serial Port Library

This is cross-platform(build passing High-Sierra and Win10) serial port library written in C++ , and for demo application wxTerm.


SerialPortLibrary in more detail : Github 

2019年1月13日 星期日

2018年12月20日 星期四

Pulse Oximeter with MAX3010X

在同一波長下針對Hb和HbO2的吸收(extinction coefficient or absorption coefficient)有差異,而如果要求SPo2量測兩個不同波長的吸收就可以求解一個未知數。

因為光對於動脈微血管血液的變化(隨著心率)會有交流訊號,而其他的組織(吸收散射反射)則是直流成分,因此將兩波長反射量變化正規化後的結果作為R-Ration(SPo2為非線性),利用經驗公式A, B係數可得一SPo2曲線,例如660nm/940nm = 1, SPo2 = 85%,例如A - B = 110 - 25 斜率。
 具體實現只要動態的將直流成分除去,並且將兩波長光直流水平控制在一範圍(SPo2都有類似PGA的功能),得到的兩波長交流訊號RMS比值即可推算SPo2。


以下Github包含STM32F4 Driver for MAX30100(移植Reference 1.範例),和MAC OS X上的C++ wxWidgets GUI(左下角顯示SPo2)可透過VCP與STM32F4通訊,當然除了此方法使用更多的波長可以使SPo2求解聯立方程更加準確,並且實務上會做更高精度的SPo2曲線的建立以及motion artifact除去等。


Download : 


Demo : 

Reference : 
1. https://morf.lv/implementing-pulse-oximeter-using-max30100 
2. http://www.ti.com/lit/an/slaa274b/slaa274b.pdf 
3. http://www.ti.com/lit/ug/tidu542/tidu542.pdf 
4. http://sam-koblenski.blogspot.com/2015/11/everyday-dsp-for-programmers-dc-and.html


2018年9月21日 星期五

Xcode 10.0 update problem of wxWidgets (g++)


ld: warning: /System/Library/Frameworks//...

try dylib to TBD files:

https://github.com/EOSIO/eos/issues/5418
and
http://sd.jtimothyking.com/2018/07/26/stub-file-and-library-file-out-of-sync/

if the problem remains unsolved:

1. sudo mv /Library/Developer/CommandLineTools /Library/Developer/CommandLineTools.old
2. sudo rm -rf /Library/Developer/CommandLineTools.old
3. Download Command Line Tools from AppleDeveloper :https://developer.apple.com/download/more/
4. Double Click *.dmg (e.g. Command_Line_Tools_macOS_10.13_for_Xcode_9.2.dmg) install
5. Rebuild your wxWidgets project with g++

2018年9月9日 星期日

wxNixieClock


wxNixieClock is time sync tool for Nixie Clock project.(Only MAC-OS-X)

g++ -o2 -o wxnixieclock.app wxnixieclock.cpp serialport.cpp connectargsdlg.cpp `wx-config --cxxflags --libs` -m64

1. Pair BT of MAC and Nixie Clock.
2. Open wxNixieClock.app to select tools -> Connect Device -> cu.BT device driver
3. Click SyncTime button
4. Done!

Install wxWidgets dependency in terminal

1. user$ /usr/bin/ruby -e "$(curl -fsSL https://raw.githubusercontent.com/Homebrew/install/master/install)" 
2. brew install wxwidgets 


Reference : Nixie Clock

2018年9月7日 星期五

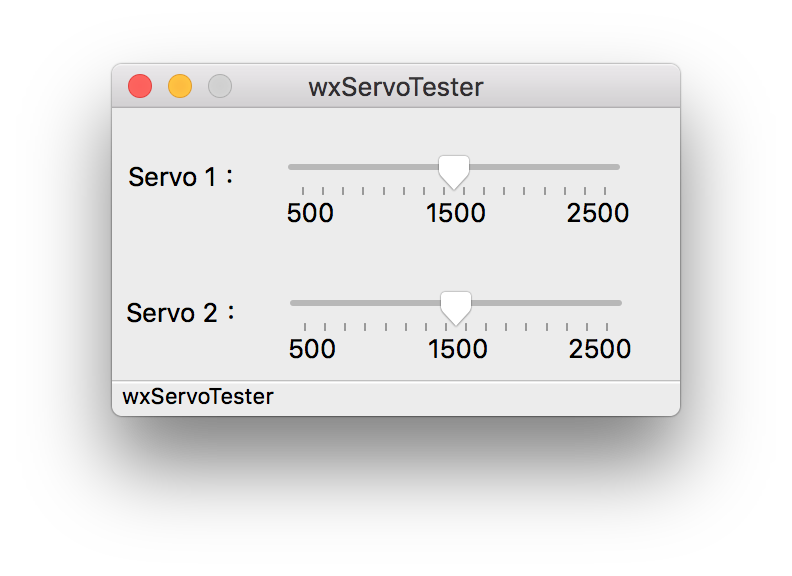
STM32F407-MG996R and MAC OS X GUI tester

STM32F407 with PWM to control MG996R, and GUI tester for MAX OS X

1.
make STM32F407 project, and burn to board.(0.5ms~2.5ms)
2.
build GUI
g++ -o2 -o wxservotester.app wxservotester.cpp serialport.cpp connectargsdlg.cpp `wx-config --cxxflags --libs`
3.
wxservotester.app -> Tools -> ConnectDevice
4.
Test your servo motor!


2018年7月8日 星期日

Real-Time wxSignalProcess with Serial Port(VCP) for MAC OS X


一個C++ MAC OS X的範例從/dev/tty.* or /dev/cu.* device driver取得Virtual COM Port的資料並且顯示在GUI,Framework用wxWidgets 3.0以及MRPT修改版的wxMathPlot 0.1.2,和修改以前Linux POSIX API的Class組合,多增加ioctl讀取,以及一個STM32F4的DMA+ADC的Example可供測試。

過去同性質不同平台的軟體參考:


2017年3月16日 星期四

wxSignalProcess with wxMathPlot

    最近需要用Plot功能,找到wxMathPlot用起來還不錯,簡單易用執行上也還可以,我做了一個處理Signal的Example供往後參考。


2016年1月7日 星期四

Digital Holography - Distance Meter


Grating製作與原理

sensitive to energy(exposure)= intensity * time = |Uo(x,y)|^2 * t = |a(x,y)|^2

z0 = film
object wave Uo(x,y) = |a(x,y)|*e^j fi(x,y)

reference wave Ur(x,y) = |A(x,y)|*e^j fi(x,y)

Exposure E(x,y) = I(x,y)*t = |Uo(x,y) + Ur(x,y)|^2 * t

tA(x) = BetaE^(x)
= Beta * t * I(x) 
= Beta * t * |A|^2 + Beta*t{|a(x)|^2 + A_star(x)a(x) + A(x)a_star(x)}
=t_beta + Beta’*{|a(x)|^2 + a|A||a(x) [fi_r-fi_o]|}

當重建時的調變元素

Reconstruct of object wave Illumination wave Up(x)照Hologram film重建,穿過去的光
Transmitted wave Ut(x)
= Up(x)*tA(x)
= Up(x)*t{|a(x)|^2 + A_star(x)a(x) + A(x)a_star(x)}
= A(x)*{t_beta + beta’*[|a(x)|^2 + A_star(x)a(x) + A(x)a_star(x)]}
= U1(x)+U2(x)+U3(x)+U4(x)
{
U1(x) = A(x)*t_beta = directing transmitted A(x)
U2(x) = beta’*|a(x)|^2*A(x) = Modulated A(x)
U3(x) = beta’*|A|^2*a(x) = original object wave(primary image,virtual image)
U4(x) = beta’*|A|^2*e^j fi_r(x,y)*a(x)^x = conjugate image,real image
}

由不同角度的共軛光去重建
U4(x) = beta’*|A|^2*a(x)^x,conjugate image a(x)^2 real image會出現在virtual image方向,real image看起來會跟virtual image相反,例如凹凸前後相反看起來不合日常邏輯。

Fourier Transform 待補

Fresnel Equation 待補


由三角原理求距離


其中在此範例 theta i = 0,grating light pair = 1/125*1/2mm,波長 = 532nm,CCD Pixel size = 1.75um,theta A = 4.5mm = 雷射通過光圈,O0~O1|O-1 = 中間強度干涉分佈最強與旁邊兩點的距離任取一。


2015年10月6日 星期二

Raspberry Pi 2 + Raspicam + wxWidgets + OpenCV

    最近在設計一些Prototype所以先找RPi2實驗後再轉到FPGA,因爲我是裝Raspbian,所以wxWidgets跟OpenCV編法跟Debian一樣,主要就多個Raspicam c++ API直接給OpenCV 2 API的格式,找來編完後依照要的Mode給參數就可以讀取Raspicam的Video Stream了。


2013年4月1日 星期一

wxKinect - Hand Detect

  前幾天看到一個日本人寫的這篇檢測手的方法,流程:Frame轉成HSV(因為要檢測顏色) =>  濾波(去除雜訊) => 將膚色作為閾值做二值化 => 接著就是標準的找輪廓(Find Contours)、找尋凸包(Convex Hull)、找尋凸缺陷(Convexity Defects),就可以找到手的幾個辨識關鍵,實作這個方法後感覺還可以但是就沒有發揮到Kinect的功能,不過昨天在GitHub看到這篇,有個我覺得很高明的地方也利用到Kinect的特點,就是直接把手的深度範圍當作閾值獨立出手的部分算是蠻準的,其餘的處理就都是一樣了,玩Kinect一個禮拜感覺上可以發揮的點很多。


wxKinect.h


#ifndef __WX_KINECT__
#define  __WX_KINECT__

#if _MSC_VER < 1600
typedef __int64 int64_t;
typedef unsigned __int64 uint64_t;
typedef unsigned __int32 uint32_t;
typedef unsigned __int16 uint16_t;
typedef unsigned __int8 uint8_t;
#else
#include <stdint.h>
#endif

#include <wx/wx.h>

#include <cv.h>
#include <highgui.h>

#include <NiTE.h>

const int SCREEN_WIDTH = 640;
const int SCREEN_HIGHT = 480;
/*
const int ROI_MAX_SIZE_X = 540;
const int ROI_MAX_SIZE_Y = 380;
*/
const float DEPTH_SACLE = 255.0f / 4096.0f;
const int HAND_ROI_SIZE = 100;

const int LIKELY_THE_HAND_AREA = 2000;
const float HAND_IS_GRASPING = 0.8f;

const int DEPTH_RANGE = 7;

class App:public wxApp
{
public:
bool OnInit();
};

class Frame:public wxFrame
{
public:
Frame(const wxString&);
~Frame();

void InitKinect();
void CreateUI();
void Display();

void OnExit(wxCommandEvent&);
private:
friend class Thread;
Thread *thread;

nite::HandTracker hand_tracker;
nite::HandTrackerFrameRef hand_tracker_frame;

wxPanel *depth_screen;
wxPanel *hand_screen;

DECLARE_EVENT_TABLE()
};

BEGIN_EVENT_TABLE(Frame,wxFrame)
EVT_MENU(wxID_EXIT,Frame::OnExit)
END_EVENT_TABLE()

class Thread:public wxThread
{
public:
Thread(Frame*);

void* Entry();
private:
Frame *frame;
};

#endif


wxKinect.cpp


#include "wxKinect.h"

DECLARE_APP(App)
IMPLEMENT_APP(App)

bool App::OnInit()
{
Frame *frame = new Frame(wxT("wxKinect - Hand Detect"));

frame->Show(true);

return true;
}

Frame::Frame(const wxString &title):wxFrame(NULL,wxID_ANY,title,wxDefaultPosition,wxSize(700,800),wxMINIMIZE_BOX | wxCLOSE_BOX | wxCAPTION | wxSYSTEM_MENU)
{
InitKinect();
CreateUI();

thread = new Thread(this);
thread->Create();
thread->Run();
}

void Frame::CreateUI()
{
wxMenu *file = new wxMenu;
file->Append(wxID_EXIT,wxT("E&xit\tAlt-q"),wxT("exit"));

wxMenuBar *bar = new wxMenuBar;
bar->Append(file,wxT("file"));
SetMenuBar(bar);

wxBoxSizer *top = new wxBoxSizer(wxVERTICAL);
this->SetSizer(top);

wxBoxSizer *screen_box = new wxBoxSizer(wxVERTICAL);
top->Add(screen_box,0,wxALIGN_CENTER_HORIZONTAL | wxALL,5);

depth_screen = new wxPanel(this,wxID_ANY,wxDefaultPosition,wxSize(SCREEN_WIDTH,SCREEN_HIGHT));
screen_box->Add(depth_screen,0,wxALIGN_CENTER_HORIZONTAL | wxALIGN_CENTER_VERTICAL,5);

hand_screen = new wxPanel(this,wxID_ANY,wxDefaultPosition,wxSize(HAND_ROI_SIZE * 2,HAND_ROI_SIZE * 2));
screen_box->Add(hand_screen,0,wxALIGN_CENTER_HORIZONTAL | wxALIGN_CENTER_VERTICAL,5);

CreateStatusBar(2);
SetStatusText(wxDateTime::Now().Format());
}

void Frame::InitKinect()
{
nite::NiTE::initialize();

hand_tracker.create();
hand_tracker.startGestureDetection(nite::GESTURE_CLICK);
hand_tracker.startGestureDetection(nite::GESTURE_WAVE);
hand_tracker.startGestureDetection(nite::GESTURE_HAND_RAISE);
}

Frame::~Frame()
{
thread->Delete();

//hand_tracker.destroy();
nite::NiTE::shutdown();
}

void Frame::Display()
{
hand_tracker.readFrame(&hand_tracker_frame);

cv::Mat depth_mat(hand_tracker_frame.getDepthFrame().getHeight(),hand_tracker_frame.getDepthFrame().getWidth(),CV_16UC1,(void*)hand_tracker_frame.getDepthFrame().getData());
depth_mat.convertTo(depth_mat,CV_8UC1,DEPTH_SACLE);

const nite::Array<nite::GestureData> &gestures = hand_tracker_frame.getGestures();
CvPoint2D32f position;

for(int i = 0;i < gestures.getSize();++i){

if(gestures[i].isComplete()){

const nite::Point3f &pos = gestures[i].getCurrentPosition();
nite::HandId hand_id;
hand_tracker.startHandTracking(pos,&hand_id);
}
}

const nite::Array<nite::HandData> &hands = hand_tracker_frame.getHands();

for(int i = 0;i < hands.getSize();++i){

const nite::HandData hand = hands[i];

if(hand.isTracking()){ //如果跟蹤到手的運動

const nite::Point3f &pos = hand.getPosition();
hand_tracker.convertHandCoordinatesToDepth(pos.x,pos.y,pos.z,&position.x,&position.y);
float hand_depth = pos.z * DEPTH_SACLE;

/*
* 將ROI設定在手的大小左右,
* 而且ROI範圍不可以超出擷取的影像否則會丟出Exception。
*/
cv::Rect hand_roi;
hand_roi.width = HAND_ROI_SIZE * 2;
hand_roi.height = HAND_ROI_SIZE * 2;
hand_roi.x = position.x - HAND_ROI_SIZE;
hand_roi.y = position.y - HAND_ROI_SIZE;
int ROI_MAX_SIZE_X = SCREEN_WIDTH - (HAND_ROI_SIZE * 2);
int ROI_MAX_SIZE_Y = SCREEN_HIGHT - (HAND_ROI_SIZE * 2);
if(hand_roi.x < 0){hand_roi.x = 0;}
if(hand_roi.x > ROI_MAX_SIZE_X){hand_roi.x = ROI_MAX_SIZE_X;}
if(hand_roi.y < 0){hand_roi.y = 0;}
if(hand_roi.y > ROI_MAX_SIZE_Y){hand_roi.y = ROI_MAX_SIZE_Y;}

cv::Mat hand_roi_mat(cv::Mat(depth_mat,hand_roi).clone());
hand_roi_mat = (hand_roi_mat > (hand_depth - DEPTH_RANGE)) & (hand_roi_mat < (hand_depth + DEPTH_RANGE)); //這裡是關鍵,二值化的閾值取決於手的深度範圍。

cv::medianBlur(hand_roi_mat,hand_roi_mat,5); //做中值濾波使邊緣明顯
cv::Mat hand_roi_debug;
hand_roi_debug = hand_roi_mat.clone();
cvtColor(hand_roi_debug,hand_roi_debug,CV_GRAY2RGB);

std::vector<std::vector<cv::Point> > contours;
cv::findContours(hand_roi_mat,contours,CV_RETR_LIST,CV_CHAIN_APPROX_SIMPLE); //找尋所有可能的多邊形邊緣

if(contours.size()){ //如果有找到

for (int i = 0;i < contours.size();i++){ //則迭代每個多邊形邊緣

std::vector<cv::Point> contour = contours[i];
cv::Mat contour_mat = cv::Mat(contour);
double contour_area = cv::contourArea(contour_mat); //計算該多邊形面積

if(contour_area > LIKELY_THE_HAND_AREA){ //如果大於這個值則可能是手的面積

cv::Scalar center = mean(contour_mat);
cv::Point center_point = cv::Point(center.val[0],center.val[1]);

std::vector<cv::Point> approx_curve;
cv::approxPolyDP(contour_mat,approx_curve,10,true); //逼近該多邊形的邊緣

std::vector<std::vector<cv::Point> > contour_vector;
contour_vector.push_back(approx_curve);
cv::drawContours(hand_roi_debug,contour_vector,0,CV_RGB(255,0,0),3); //畫出該多邊形的邊緣

/*
* 找尋凸包(Convex Hull)並畫出點。
*/
std::vector<int> hull;
cv::convexHull(cv::Mat(approx_curve),hull,false,false);
for(int j = 0;j < hull.size();j++){
int index = hull[j];
cv::circle(hand_roi_debug,approx_curve[index],3,CV_RGB(0,255,0),2);
}

/*
* 找尋凸缺陷(Convexity Defects)並畫出點。
*/
std::vector<CvConvexityDefect> convex_defects;
CvSeq* contour_points;
CvSeq* defects;
CvMemStorage* storage;
CvMemStorage* str_defects;
CvMemStorage* contour_str;
CvConvexityDefect *defect_array = 0;
str_defects = cvCreateMemStorage();
defects = cvCreateSeq(CV_SEQ_KIND_GENERIC|CV_32SC2, sizeof(CvSeq),sizeof(CvPoint),str_defects);
contour_str = cvCreateMemStorage();
contour_points = cvCreateSeq(CV_SEQ_KIND_GENERIC | CV_32SC2,sizeof(CvSeq),sizeof(CvPoint),contour_str);
for(int j = 0; j < (int)approx_curve.size(); j++) {
CvPoint cp = {approx_curve[j].x,approx_curve[j].y};
cvSeqPush(contour_points, &cp);
}
int count = (int)hull.size();
int *convert_hull = (int*)malloc(count * sizeof(int));
for(int j = 0;j < count;j++){
convert_hull[j] = hull.at(j);
}
CvMat hull_mat = cvMat(1,count,CV_32SC1,convert_hull);
storage = cvCreateMemStorage(0);
defects = cvConvexityDefects(contour_points, &hull_mat,storage);
defect_array = (CvConvexityDefect*)malloc(sizeof(CvConvexityDefect)*defects->total);
cvCvtSeqToArray(defects,defect_array,CV_WHOLE_SEQ);
for(int j = 0;j < defects->total;j++){
CvConvexityDefect def;
def.start       = defect_array[j].start;
def.end         = defect_array[j].end;
def.depth_point = defect_array[j].depth_point;
def.depth       = defect_array[j].depth;
convex_defects.push_back(def);
}
for(int j = 0;j < convex_defects.size();j++){
cv::circle(hand_roi_debug,cv::Point(convex_defects[j].depth_point->x,convex_defects[j].depth_point->y),3,CV_RGB(0,0,255),2);
}
cvReleaseMemStorage(&contour_str);
cvReleaseMemStorage(&str_defects);
cvReleaseMemStorage(&storage);
free(defect_array);

/*
* 這裡也算關鍵,直接把逼近的面積除以凸包的面積得到的值來決定手是張開還是合閉。
*/
std::vector<cv::Point> hull_points;
for(int j = 0;j < hull.size();j++){
int curve_index = hull[j];
cv::Point p = approx_curve[curve_index];
hull_points.push_back(p);
}
double hull_area  = cv::contourArea(cv::Mat(hull_points));
double curve_area = cv::contourArea(cv::Mat(approx_curve));
double hand_ratio = curve_area / hull_area;
if(hand_ratio > HAND_IS_GRASPING){
cv::circle(hand_roi_debug,center_point,5,CV_RGB(255,0,255),5); //張手就在手中心畫出淺綠的點
}
else{
cv::circle(hand_roi_debug,center_point,5,CV_RGB(100,220,80),5); //閉手就在手中心畫出粉紅的點
}

IplImage hand_image(hand_roi_debug);
wxClientDC hand_dc(hand_screen);
cvConvertImage(&hand_image,&hand_image,CV_CVTIMG_SWAP_RB);
unsigned char *data;
cvGetRawData(&hand_image,&data);
wxImage *image = new wxImage(hand_image.width,hand_image.height,data,true);
wxBitmap *bitmap = new wxBitmap(*image);
int x,y,width,height;
hand_dc.GetClippingBox(&x,&y,&width,&height);
hand_dc.DrawBitmap(*bitmap,x,y);
delete image;
delete bitmap;
}
}
}
//imwrite("hand.jpg",hand_roi_image);
}
}

IplImage depth_image(depth_mat);
IplImage *convert_image = cvCreateImage(cvGetSize(&depth_image),IPL_DEPTH_8U,3);
cvCvtColor(&depth_image,convert_image,CV_GRAY2BGR);

wxClientDC depth_dc(depth_screen);
cvConvertImage(convert_image,convert_image,CV_CVTIMG_SWAP_RB);
unsigned char *data;
cvGetRawData(convert_image,&data);
wxImage *image = new wxImage(convert_image->width,convert_image->height,data,true);
wxBitmap *bitmap = new wxBitmap(*image);
int x,y,width,height;
depth_dc.GetClippingBox(&x,&y,&width,&height);
depth_dc.DrawBitmap(*bitmap,x,y);

delete image;
delete bitmap;
cvReleaseImage(&convert_image);
}

void Frame::OnExit(wxCommandEvent &event)
{
Close();
}

Thread::Thread(Frame *parent):wxThread(wxTHREAD_DETACHED)
{
frame = parent;
}

void* Thread::Entry()
{
while(!TestDestroy()){
frame->Display();
}

return NULL;
}


參考:

2013年3月25日 星期一

wxKinect

  話說老師的Lab東西很多昨天借了Kinect來玩一下,寫一個Demo試試SDK可以很簡單讀取骨架也可以選擇顯示Color & Depth & Canny...等等的影像處理,感覺OpenNI很好用,OpenNI 2在Windows下已經不使用這個Driver了而改用MS Kinect SDK的Driver,整體來說影像格式轉換比較浪費時間 OpenNI & NiTE => OpenCV => wxWidgets 不過應付FPS只有30的Kinect已經足夠,使用OpenNI或其他Middleware如果在VS2008含以下必須判斷一下然後做一些Define,收到的深度影像是CV_16UC1且數值是0 ~ 4096(10000),要轉換成CV_8UC1要把數值從0 ~ 4096(10000)映射到0 ~ 255畫出來顏色才不會太黑,如果要轉換到wxImage直接灰階轉彩色就好(CV_GRAY2BGR),然後如果要Release Binarry就要把OpenNI含Middleware的SDK安裝目錄下的Redist目錄內的動態連結檔案與Redist底下還有一個資料夾放一起就可以了。


wxKinect.h


#ifndef __WX_KINECT__
#define __WX_KINECT__

#if _MSC_VER < 1600
typedef __int64 int64_t;
typedef unsigned __int64 uint64_t;
typedef unsigned __int32 uint32_t;
typedef unsigned __int16 uint16_t;
typedef unsigned __int8 uint8_t;
#else
#include <stdint.h>
#endif


#include <wx/wx.h>

#include <highgui.h>
#include <cv.h>

#include <OpenNI.h>
#include <NiTE.h>

const int SCREEN_WIDTH = 640;
const int SCREEN_HIGHT = 480;

const int COLOR_MODE = 1;
const int DEPTH_MODE = 2;
const int CANNY_MODE = 3;

enum{
ID_COLOR_FRAME = 100,
ID_DEPTH_FRAME,
ID_CANNY_FRAME
};

class App:public wxApp
{
public:
bool OnInit();
};

class Frame:public wxFrame
{
public:
Frame(const wxString&);
~Frame();

void CreateUI();
void InitKinect();

void Display();

void OnExit(wxCommandEvent&);
void OnColor(wxCommandEvent&);
void OnDepth(wxCommandEvent&);
void OnCanny(wxCommandEvent&);
private:
friend class Thread;
Thread *thread;

openni::Device device;
nite::UserTracker user_tracker;
openni::VideoMode color_mode;
openni::VideoStream color_stream;
openni::VideoMode depth_mode;
openni::VideoStream depth_stream;
openni::VideoFrameRef color_frame;
openni::VideoFrameRef depth_frame;
nite::UserTrackerFrameRef user_tracker_frame;
int max_depth;

int select_mode;

wxPanel *screen;

DECLARE_EVENT_TABLE()
};

BEGIN_EVENT_TABLE(Frame,wxFrame)
EVT_MENU(wxID_EXIT,Frame::OnExit)
EVT_MENU(ID_COLOR_FRAME,Frame::OnColor)
EVT_MENU(ID_DEPTH_FRAME,Frame::OnDepth)
EVT_MENU(ID_CANNY_FRAME,Frame::OnCanny)
END_EVENT_TABLE()

class Thread:public wxThread
{
public:
Thread(Frame*);

void* Entry();
private:
Frame *frame;
};

#endif


wxKinect.cpp


#include "wxKinect.h"

DECLARE_APP(App)
IMPLEMENT_APP(App)

bool App::OnInit()
{
Frame *frame = new Frame(wxT("wxKinect"));

frame->Show(true);

return true;
}

Frame::Frame(const wxString &title):wxFrame(NULL,wxID_ANY,title,wxDefaultPosition,wxSize(800,600),wxMINIMIZE_BOX | wxCLOSE_BOX | wxCAPTION | wxSYSTEM_MENU)
{
InitKinect();
CreateUI();

select_mode = COLOR_MODE;

thread = new Thread(this);
thread->Create();
thread->Run();
}

Frame::~Frame()
{
thread->Delete();

color_stream.destroy();
depth_stream.destroy();
device.close();
openni::OpenNI::shutdown();
nite::NiTE::shutdown();
}

void Frame::CreateUI()
{
wxMenu *file = new wxMenu;
file->Append(wxID_EXIT,wxT("E&xit\tAlt-q"),wxT("exit"));

wxMenu *select = new wxMenu;
select->AppendRadioItem(ID_COLOR_FRAME,wxT("c&olor\tCtrl-c"),wxT("color"));
select->AppendRadioItem(ID_DEPTH_FRAME,wxT("d&epth\tCtrl-d"),wxT("depth"));
select->AppendRadioItem(ID_CANNY_FRAME,wxT("c&anny\tCtrl-x"),wxT("canny"));

wxMenuBar *bar = new wxMenuBar;
bar->Append(file,wxT("file"));
bar->Append(select,wxT("select"));
SetMenuBar(bar);

wxBoxSizer *top = new wxBoxSizer(wxVERTICAL);
this->SetSizer(top);

wxBoxSizer *screen_box = new wxBoxSizer(wxHORIZONTAL);
top->Add(screen_box,0,wxALIGN_CENTER_HORIZONTAL | wxALL,5);

screen = new wxPanel(this,wxID_ANY,wxDefaultPosition,wxSize(SCREEN_WIDTH,SCREEN_HIGHT));
screen_box->Add(screen,0,wxALIGN_CENTER_HORIZONTAL | wxALIGN_CENTER_VERTICAL,5);

CreateStatusBar(2);
SetStatusText(wxDateTime::Now().Format());
}

void Frame::InitKinect()
{
openni::OpenNI::initialize();
nite::NiTE::initialize();

device.open(openni::ANY_DEVICE);
device.setImageRegistrationMode(openni::IMAGE_REGISTRATION_DEPTH_TO_COLOR);

user_tracker.create();
user_tracker.setSkeletonSmoothingFactor(0.1f);

color_mode.setFps(30);
color_mode.setResolution(SCREEN_WIDTH,SCREEN_HIGHT);
color_mode.setPixelFormat(openni::PIXEL_FORMAT_RGB888);

color_stream.setVideoMode(color_mode);
color_stream.create(device,openni::SENSOR_COLOR);
color_stream.start();

depth_mode.setFps(30);
depth_mode.setResolution(SCREEN_WIDTH,SCREEN_HIGHT);
depth_mode.setPixelFormat(openni::PIXEL_FORMAT_DEPTH_100_UM);

depth_stream.setVideoMode(depth_mode);
depth_stream.create(device,openni::SENSOR_DEPTH);
depth_stream.start();
max_depth = depth_stream.getMaxPixelValue();
}

void Frame::Display()
{
color_stream.readFrame(&color_frame);
depth_stream.readFrame(&depth_frame);
user_tracker.readFrame(&user_tracker_frame);

cv::Mat RGBMat(color_frame.getHeight(),color_frame.getWidth(),CV_8UC3,(void*)color_frame.getData());
IplImage color_image(RGBMat);
cvCvtColor(&color_image,&color_image,CV_RGB2BGR);

cv::Mat DepthMat(depth_frame.getHeight(),depth_frame.getWidth(),CV_16UC1,(void*)depth_frame.getData());
DepthMat.convertTo(DepthMat,CV_8UC1,255.0f / max_depth);
IplImage depth_image(DepthMat);

IplImage *select_image = cvCreateImage(cvGetSize(&color_image),IPL_DEPTH_8U,3);

if(select_mode == COLOR_MODE){
cvCopyImage(&color_image,select_image);
}
else if(select_mode == DEPTH_MODE){
cvCvtColor(&depth_image,select_image,CV_GRAY2BGR);
}
else if(select_mode == CANNY_MODE){
cvCanny(&depth_image,&depth_image,50,200);
cvCvtColor(&depth_image,select_image,CV_GRAY2BGR);
}

const nite::Array<nite::UserData> &users = user_tracker_frame.getUsers();
for(int i = 0;i < users.getSize();++i){
const nite::UserData &user = users[i];

if(user.isNew()){
user_tracker.startSkeletonTracking(user.getId());
}
else if(user.isLost()){
}

if(user.isVisible()){
const nite::Skeleton &skeleton = user.getSkeleton();
nite::SkeletonJoint joints[15];

if(skeleton.getState() == nite::SKELETON_TRACKED){
joints[0] = skeleton.getJoint(nite::JOINT_HEAD);
joints[1] = skeleton.getJoint(nite::JOINT_NECK);
joints[2] = skeleton.getJoint(nite::JOINT_LEFT_SHOULDER);
joints[3] = skeleton.getJoint(nite::JOINT_RIGHT_SHOULDER);
joints[4] = skeleton.getJoint(nite::JOINT_LEFT_ELBOW);
joints[5] = skeleton.getJoint(nite::JOINT_RIGHT_ELBOW);
joints[6] = skeleton.getJoint(nite::JOINT_LEFT_HAND);
joints[7] = skeleton.getJoint(nite::JOINT_RIGHT_HAND);
joints[8] = skeleton.getJoint(nite::JOINT_TORSO);
joints[9] = skeleton.getJoint(nite::JOINT_LEFT_HIP);
joints[10] = skeleton.getJoint(nite::JOINT_RIGHT_HIP);
joints[11] = skeleton.getJoint(nite::JOINT_LEFT_KNEE);
joints[12] = skeleton.getJoint(nite::JOINT_RIGHT_KNEE);
joints[13] = skeleton.getJoint(nite::JOINT_LEFT_FOOT);
joints[14] = skeleton.getJoint(nite::JOINT_RIGHT_FOOT);
}

CvPoint2D32f point[15];
for(int i = 0;i < 15;++i){
const nite::Point3f &pos = joints[i].getPosition();
user_tracker.convertJointCoordinatesToDepth(pos.x,pos.y,pos.z,&(point[i].x),&(point[i].y));
}

cvLine(select_image,cvPoint(point[0].x,point[0].y),cvPoint(point[1].x,point[1].y),CV_RGB(255,0,0),3);
cvLine(select_image,cvPoint(point[1].x,point[1].y),cvPoint(point[2].x,point[2].y),CV_RGB(255,0,0),3);
cvLine(select_image,cvPoint(point[1].x,point[1].y),cvPoint(point[3].x,point[3].y),CV_RGB(255,0,0),3);
cvLine(select_image,cvPoint(point[2].x,point[2].y),cvPoint(point[4].x,point[4].y),CV_RGB(255,0,0),3);
cvLine(select_image,cvPoint(point[3].x,point[3].y),cvPoint(point[5].x,point[5].y),CV_RGB(255,0,0),3);
cvLine(select_image,cvPoint(point[4].x,point[4].y),cvPoint(point[6].x,point[6].y),CV_RGB(255,0,0),3);
cvLine(select_image,cvPoint(point[5].x,point[5].y),cvPoint(point[7].x,point[7].y),CV_RGB(255,0,0),3);
cvLine(select_image,cvPoint(point[1].x,point[1].y),cvPoint(point[8].x,point[8].y),CV_RGB(255,0,0),3);
cvLine(select_image,cvPoint(point[8].x,point[8].y),cvPoint(point[9].x,point[9].y),CV_RGB(255,0,0),3);
cvLine(select_image,cvPoint(point[8].x,point[8].y),cvPoint(point[10].x,point[10].y),CV_RGB(255,0,0),3);
cvLine(select_image,cvPoint(point[9].x,point[9].y),cvPoint(point[11].x,point[11].y),CV_RGB(255,0,0),3);
cvLine(select_image,cvPoint(point[10].x,point[10].y),cvPoint(point[12].x,point[12].y),CV_RGB(255,0,0),3);
cvLine(select_image,cvPoint(point[11].x,point[11].y),cvPoint(point[13].x,point[13].y),CV_RGB(255,0,0),3);
cvLine(select_image,cvPoint(point[12].x,point[12].y),cvPoint(point[14].x,point[14].y),CV_RGB(255,0,0),3);

for(int i = 0;i < 15;++i){
if(joints[i].getPositionConfidence() > 0.5f){
cvCircle(select_image,cvPoint(point[i].x,point[i].y),3,CV_RGB(0,255,0),2);
}
else{
cvCircle(select_image,cvPoint(point[i].x,point[i].y),3,CV_RGB(0,0,255),2);
}
}
}
}

wxClientDC dc(screen);
cvConvertImage(select_image,select_image,CV_CVTIMG_SWAP_RB);
unsigned char *data;
cvGetRawData(select_image,&data);
wxImage *image = new wxImage(select_image->width,select_image->height,data,true);
wxBitmap *bitmap = new wxBitmap(*image);
int x,y,width,height;
dc.GetClippingBox(&x,&y,&width,&height);
dc.DrawBitmap(*bitmap,x,y);
delete image;
delete bitmap;

cvReleaseImage(&select_image);
}

void Frame::OnColor(wxCommandEvent &event)
{
select_mode = COLOR_MODE;
}

void Frame::OnDepth(wxCommandEvent &event)
{
select_mode = DEPTH_MODE;
}

void Frame::OnCanny(wxCommandEvent &event)
{
select_mode = CANNY_MODE;
}

void Frame::OnExit(wxCommandEvent &event)
{
Close();
}

Thread::Thread(Frame *parent):wxThread(wxTHREAD_DETACHED)
{
frame = parent;
}

void* Thread::Entry()
{
while(!TestDestroy()){
frame->Display();
}

return NULL;
}


2013年3月12日 星期二

wxRovio ver.0.1.0 - WowWee Rovio

  過年後跟人拿了一隻WowWee Rovio玩玩,玩了兩個禮拜發現好像沒有錄影的軟體,所以只好自己寫一個用,在GitHub看到roviolib於是參考了之後跟他一樣用Libcurl送參數給Rovio的CGI,格式為:http://<username>:<password>@<ip>/<command>(括弧要去掉),如果使用的Command會使CGI回傳數據,則必須要寫Callback去處理他,靜態影像處理很簡單判斷JPEG格式而已,不過Video Stream搞不太懂他傳回來的是MJPEG但是處理起來很怪大小也不一,所以參考roviolib作者的Callback之後感覺是在10k~50k之間,然後啟用Video Stream時就會一直接收所以要開個Thread才不會讓Main Thread掛住,另外有個Debug功能可以開啟I2C的功能可以看我下面的參考聯結,最後我改寫的wxRovio目前沒有全功能只有我常用的,然後用wxWidget刻一個Demo用的GUI,有時間再增加功能或改改GUI。(PS:如果按鈕hold住就直接Reboot或者按Stop試試)

使用功能前記得先登入否則會Exception XD,錄影(Video Start)錄完記得停止(Video Stop),頭部的控制按鈕如果一直按著會用分段的方式升降,如果只按一下就會直接升降到定點。


開啟夜間模式會根據Framerate除以的數字決定亮度,換句話說越亮的話Framerate越少,而Auto Gain Control以為跟控制有關,不過其實功能類似於夜間模式,但不同的地方在於這個功能不會減少Framerate但是Noise會增加不少,而這兩個功能都是Debug.cgi裡面的。


wxRovio錄影(錄一小時約1.2GB)


=============2013/03/14===============

一樣的Code在Linux上編過沒問題,當然得要有wxWidgets & OpenCV & Libcurl。


如果還有改版就寫Makefile XD


g++ -o2 -o wxRovio './AddUserDialog.cpp' './App.cpp' './DeleteUserDialog.cpp' './LoggingDialog.cpp' './SetCameraDialog.cpp' './SetOtherDialog.cpp' './wxRovio.cpp' `wx-config --cxxflags --libs --unicode` `pkg-config opencv --cflags --libs` -lcurl


參考:

2013年1月28日 星期一

wxArduino IDE(?) Compile and Uploader Test

  今天早上沒事做想說來寫個Arduino IDE順便研究AVR-Toolchain的Command,UI用wxWidgets刻然後底下包AVR-GCC相關工具 and Avrdude,前者要負責編譯code以及用到的Arduino Library,所以自己的IDE要寫個解析Include多少Arduino Library的Function,最後將這些編譯後檔案的obj File與Arduino自帶的Core328(ATmega328) Link完之後產生HEX File,再由給定的Command(MCU的Baudrate と Clock と Serial Port..etc)傳給Avrdude然後將HEX File上傳到MCU上,用wxWidgets可以偷懶直接用wxExecute之類的在背景開個Shell去跑AVR-Toolchain,不過我比較喜歡用該平台的API另外開個Thread去跑,下面一個簡單的demo,主要把Blink Examples Code編譯然後上傳到Arduino,第二次把Code暗與亮從50ms改成500ms然後重新編譯上傳看到LED差異證明確實有功能。


參考:


  1. Arduino Build Process
  2. Arduino Uploader – command line utility for compiling and uploading Arduino sketch
  3. WinAVR 初體驗

2012年12月25日 星期二

我現在才知道有CPUID這東西...

    最近想在Library中加入測試SSE指令集支援程度,然後看到這篇有cpuid這指令可用,功能選擇跟中斷很像根據eax決定。

2012年12月18日 星期二

wxWidgets Connect Arduino(Windows)

    跟之前的wxWidgets Connect Arduino(Linux)一樣,只不過變成Windows版,因為只用Serial Port所以Enumeration就直接一個一個Create,如果改天要用其他如USB的Device寫成Driver會比較好處理,最後非同步有開/Od要處理WriteFile的ERROR_IO_PENDING而開/O2不用,另外我是在Windows 7 x64測試。

2012年12月2日 星期日

Windows Driver Loader

    這個月有個工作是要用隊友給的driver去對某個設備做I/O操作控制,不過這幾天發現有時DriverMonitor掛驅動有的路徑會有問題,看call CreateService建在 HKEY_LOCAL_MACHINE\SYSTEM\CurrentControlSet\Services的登錄檔ImagePath可能因為編碼問題有點錯誤,也懶得寫INF而且我不太會用工具產生XD,還有個問題我不知道是什麼原因,用看系統service運作的工具理應掛載的測試driver應該不存在了,可是似乎無法重新用DriverMonitor啟動,非得重新開機才可以,前天為了這幾個問題還花幾小時去re DriverMonitor研究幾個function,不過看不出來流程有什麼差異或問題,但還是自己寫了一個常規Loader去處理...話說隊友給的driver還是一直有問題對I/O寫資料給設備有時還是會BSoD.........Orz